How to Photograph Crystals for Social Media or Sale
Share
Crystals are beautiful in person — but capturing their color, sparkle, and structure on camera takes a little skill. Whether you're a collector, seller, or enthusiast, here’s how to photograph your minerals with clarity, confidence, and style.
1. Use Natural Light (Whenever Possible)
The best light for crystals is soft, indirect natural light — like from a north-facing window or diffused daylight. Avoid harsh direct sun, which can create glare or blow out detail.
- ☀️ Mornings or cloudy days are best
- 🪟 Use sheer curtains or a white sheet to diffuse light
2. Choose the Right Background
Keep the focus on the crystal by using a clean, neutral background. White, black, beige, or stone-textured backdrops work well depending on the crystal’s color.
- Remove clutter and visual distractions
- Use matte surfaces to avoid reflections
- For minerals with shine (like pyrite or quartz), try gray or slate tones
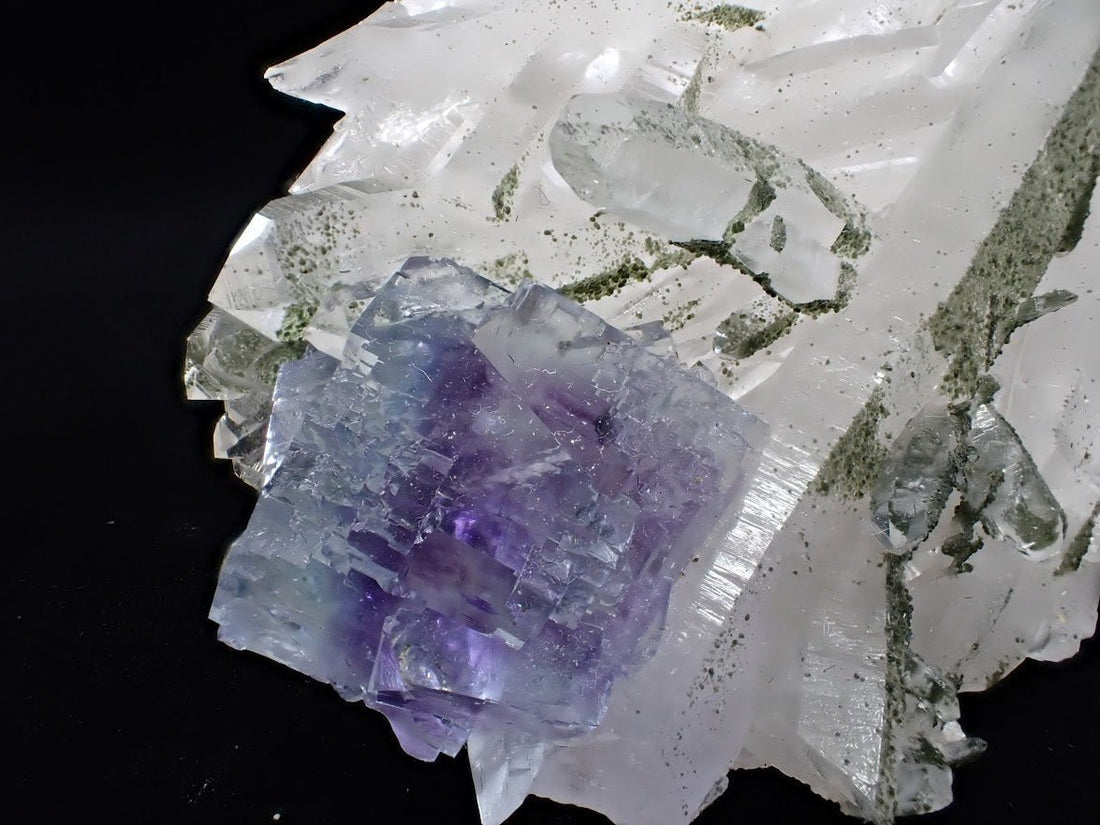
3. Highlight the Crystal’s Best Angle
Every crystal has a “hero shot.” Take a few moments to study the piece and find the angle that best shows:
- Terminations, clarity, or phantoms
- Rainbows or zoning
- 🪨 Matrix, formations, or inclusions
Rotate the crystal slowly in your light setup to find the shot that gives it dimension.
4. Use a Macro Setting or Lens
To capture fine detail — like surface texture, inclusions, or luster — use a macro lens or macro setting (most modern smartphones have this).
- 🔍 Get close to highlight structure or crystal faces
- 📱 Tap to focus on the most detailed area of the stone
5. Keep Editing Natural
It’s tempting to over-edit, but over-saturation or filters can misrepresent your crystal’s true color. Instead:
- 💡 Adjust brightness, contrast, and sharpness slightly
- 🎨 Match the crystal’s color to what it looks like in person
- 🚫 Avoid fake sparkles or unrealistic lighting effects
6. Capture Multiple Shots
For selling or showcasing a piece, offer different views:
- 📏 Front, back, and side angles
- 🧩 Close-up detail of texture or inclusions
- 📐 In-hand photo for scale (with clean, neutral hands/background)
- 🎯 Group shots for sets or scale comparison
7. Bonus Tips for Fluorescent Crystals
If you’re photographing crystals that fluoresce under UV:
- 💡 Shoot in a dark room with a longwave UV light
- 📷 Use a tripod and slow shutter (or Night mode on phones)
- 🌈 Don’t overexpose — aim to capture true glow, not washed-out light
Legacy’s Crystal Photography Philosophy
At Legacy Crystals and Minerals, we believe in honesty and intention — and that includes how our pieces are photographed. We use natural light, true-to-life colors, and careful angles to reflect each specimen as it truly is.
Whether you’re browsing our listings or sharing your own crystals online, we want the photos to feel as authentic as the pieces themselves.
👉 Explore our collection — all photographed in natural light
Final Thoughts: Let the Crystal Speak
Crystal photography is part science, part storytelling. With the right light, angle, and focus, you can showcase your minerals in ways that honor their form, energy, and beauty.
Whether you're sharing your collection, building your shop, or creating content, let your crystals shine — and speak for themselves.
💼 Thinking about starting your own crystal business? Legacy Crystals and Minerals offers wholesale opportunities and is more than happy to help guide your first steps into selling. We’re here to support your growth — from hobby to storefront.


