

Carving quality in crystals: a technical guide
Carving quality in crystals rests on three pillars: the material’s physical properties, the carver’s tool control and abrasive sequence, and the finish and provenance of the finished piece. According to the International Gem Society’s grading framework, professional gemologists assess carvings across material, workmanship, and artistry — in that order. Use the checklist below before reading the technical detail in each section.
Quick inspection checklist:
- Polish uniformity: no dull patches, streaks, or inconsistent sheen across surfaces
- Edge crispness: sharp, clean transitions between planes with no rounding or chipping
- Symmetry: balanced proportions when viewed from multiple angles
- Surface integrity: no visible resin seams, filled pits, or bloom under a 10× loupe
- Stone-to-design match: the chosen material suits the form (see material selection below)
- Provenance: seller can name the origin, carver, and any treatments applied
- Tool marks: no repeating grooves or ridges visible under raking light
- Structural soundness: no hidden fractures revealed under transmitted light
For collector-grade standards, the sections on professional grading criteria and authenticity checks explain how to test each item above.
Pro Tip: Photograph the piece under three lighting conditions — direct, raking, and transmitted — before buying. Each reveals a different class of defect.
Key takeaways
Carving quality in crystals is determined by material properties, the carver’s abrasive sequence and tool control, and verifiable provenance — no single factor alone is sufficient.
| Point | Details |
|---|---|
| Material properties set the ceiling | Mohs hardness, cleavage, and toughness determine what forms are possible and how well edges hold. |
| Abrasive sequence cannot be skipped | Each grit stage must fully remove scratches from the previous one; rushed progression leaves sub-surface marks. |
| Hand carving commands a 3×–8× premium | Labour intensity and real-time artisan decisions around inclusions justify the price difference over machine-made pieces. |
| Transparency exposes workmanship | Clear quartz reveals polish inconsistencies and grind lines that opaque materials hide; inspect under raking and transmitted light. |
| Legacy Crystals and Minerals | Offers carved specimens and polished pieces with material identification and provenance details stated in the product listings. |
Table of Contents
- Which crystals are best or worst choices for carving?
- What tools and techniques do professional carvers use?
- How the carving process works from rough stone to finished piece
- How professionals grade carving quality: objective criteria
- How to spot treatments, fakes, and undisclosed alterations
- Red flags that should stop a purchase
- Reading carving quality in real pieces from Legacy Crystals and Minerals
- How to clean and store carved crystals safely
- Legacy Crystals and Minerals: carved and polished pieces with documented provenance
- Sources
- FAQ
Which crystals are best or worst choices for carving?
Material properties set the ceiling on what a carver can achieve. Three factors matter most: Mohs hardness, cleavage, and toughness. Hardness determines which abrasives are needed and how well edges hold over time. Cleavage describes whether a stone breaks along flat planes under stress — a serious risk during fine detail work. Toughness measures resistance to fracture regardless of hardness; jade is a classic example of a soft-ish but extremely tough material.
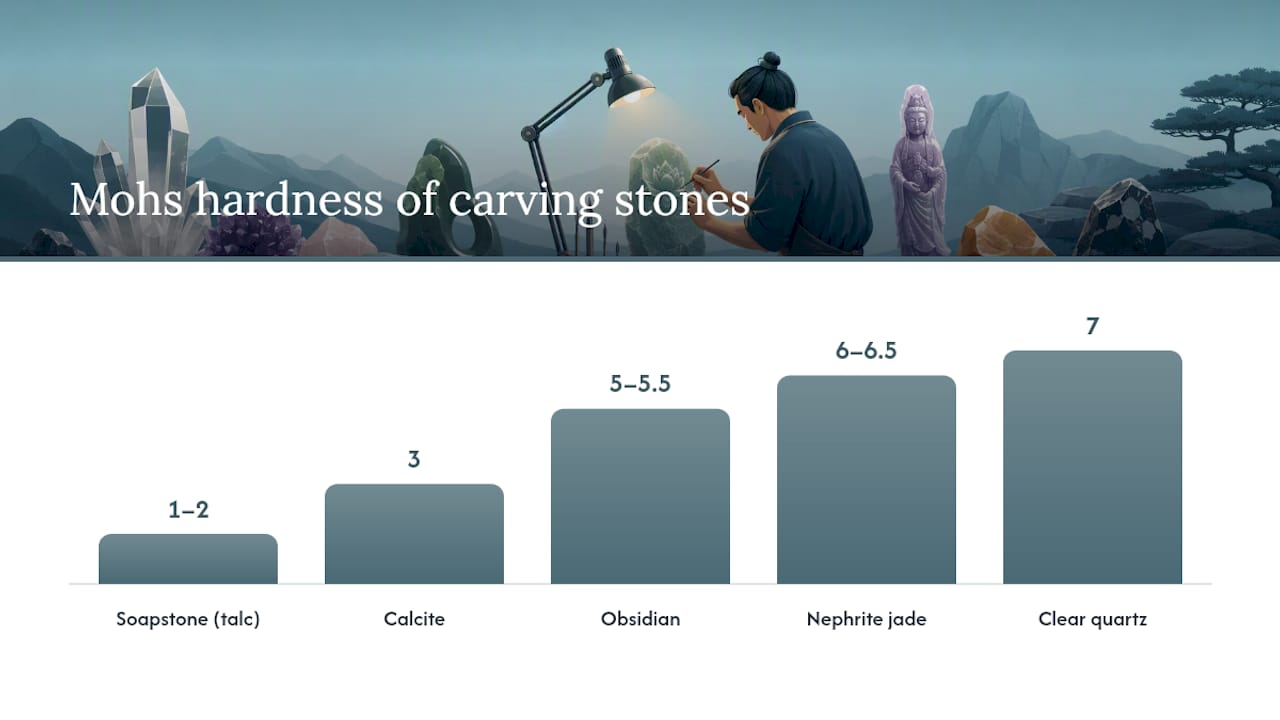
Quartz is Mohs 7 and has no perfect cleavage, which makes it durable for polished carvings but requires diamond abrasives throughout the shaping process. Hardstone carving — the traditional category covering quartz varieties such as chalcedony, agate, amethyst, and carnelian — has been the backbone of gem carving for centuries precisely because these materials hold detail well.
| Material | Mohs hardness | Cleavage / toughness | Carving strengths | Practical limits |
|---|---|---|---|---|
| Clear quartz | 7 | No perfect cleavage / good | Holds edge and polish; transparent forms reveal interior | Workmanship flaws visible through transparency |
| Agate / chalcedony | 6.5–7 | None / excellent | Takes fine detail; banding adds visual depth | Colour zoning can interrupt planned designs |
| Nephrite jade | 6–6.5 | None / exceptional | Very tough; resists chipping during undercutting | Slow to shape; requires patient abrasive work |
| Jadeite | 6.5–7 | Good cleavage / good | Vivid colour; high collector value | Cleavage risk during thin projections |
| Obsidian | 5–5.5 | Conchoidal fracture / poor | Smooth, glassy finish possible | Brittle; thin forms chip easily |
| Calcite | 3 | Perfect in 3 directions / poor | Easy to shape by hand | Soft; scratches easily; poor edge retention |
| Soapstone (talc) | 1–2 | Perfect / poor | Ideal for beginners; carves with hand tools | Too soft for fine detail at small scale |
Transparent materials such as clear quartz present a specific challenge: their clarity preserves polish and edge definition but also makes workmanship flaws more visible. A poorly controlled grind line that would be invisible in opaque agate shows clearly through a quartz sphere.
Pro Tip: Match the design to the material’s optical character. Opaque stones like agate suit bold, graphic forms with strong silhouettes. Transparent quartz rewards delicate, layered designs where internal features become part of the composition.
For buyers comparing raw versus carved forms, the material choice also affects how a piece functions aesthetically and energetically.
What tools and techniques do professional carvers use?
Professional crystal carving relies on a sequence of tools, not a single instrument. Each stage removes material at a different scale, and skipping or rushing a step leaves marks that no later polish can fully hide.
Core tools by workflow stage:
- Diamond burs (ball, cylinder, flame, and inverted cone profiles): used for roughing, detail carving, and undercutting; available in grits from 60 to 3,000
- Diamond laps and flat wheels: used for flat-plane grinding and pre-polish on larger surfaces
- Spindle and flex-shaft machines: provide variable speed and torque control for delicate work
- Ultrasonic carving tools: use high-frequency vibration with abrasive slurry to cut complex recesses without direct rotary pressure — suited to fragile or deeply undercut forms
- Faceting laps: used when a carving includes faceted elements or requires geometric precision on flat faces
The abrasive progression follows a consistent logic: rough diamond (60–120 grit) removes bulk material; medium grits (220–400) refine the form; fine grits (600–1,200) eliminate scratches from the previous stage; pre-polish compounds (1,500–3,000) prepare the surface; and final polish (cerium oxide, tin oxide, or diamond paste at 8,000–14,000 grit) produces the mirror finish. Medieval workshop studies confirm that abrasive sawing, grinding, and polishing sequences were standardised as far back as 1000 AD, and the underlying logic has not changed.
Recessed areas — the hardest surfaces to finish — require a specific approach. Professional lapidaries use stiff-bristle brushes charged with progressively finer diamond pastes; final polishing passes are sometimes performed dry or at controlled speeds to avoid washing the abrasive compound away.
Hand carving versus CNC: CNC machines excel at repeatable geometric forms and roughing large volumes quickly. Hand finishing, however, involves real-time decisions around inclusions, colour shifts, and structural weaknesses that a machine cannot make. Hand-carved pieces command a 3×–8× price premium over machine-made equivalents because of that labour intensity and artisan decision-making. Hybrid workflows — CNC roughing followed by hand finishing — are now common; knowing which steps were hand-finished is relevant when assessing price. For context on how handcrafted labour costs translate to price, the same principles apply across carved crystals and fine jewellery.
Safety note: Grinding quartz and silica-bearing stones produces fine respirable dust. Silicosis is a serious and irreversible lung condition. Always work wet (water suppresses airborne particles), use a properly rated respirator (N95 minimum; P100 preferred for sustained work), and ensure adequate ventilation. This applies to any stone with silica content, including quartz, agate, chalcedony, and jasper.
Pro Tip: For mirror finishes in recessed details, cut a stiff-bristle brush short so it holds its shape under pressure, charge it with 3,000-grit diamond paste, and work at low speed. Finish dry with 8,000-grit paste for the final pass.
How the carving process works from rough stone to finished piece
The workflow from raw material to finished carving follows a defined sequence. Quality is created — and lost — at specific points.
- Selection and planning: The carver examines the rough for inclusions, fractures, colour distribution, and grain orientation. A design is chosen that works with the stone’s natural features, not against them. Fractures near the planned surface are a disqualifying defect at this stage.
- Rough shaping: Bulk material is removed with coarse diamond burs or saws. The form is established but left oversized. Inspection point: photograph the rough shape before detail work begins.
- Detail carving: Fine burs define edges, recesses, and surface texture. This is where the most skill is concentrated. Thin projections and undercuts are cut last to reduce vibration risk.
- Sanding and grit progression: The surface moves through the abrasive sequence described above (220 → 400 → 600 → 1,200 grit). Each stage must fully remove the scratches from the previous one before advancing.
- Pre-polish and polish: Compounds bring the surface to its final sheen. Recessed areas are finished with charged brushes. The piece is cleaned between each compound change.
- Finishing and mounting: The carving is inspected under magnification for tool marks, uneven polish, and structural issues. If it is to be set or mounted, the setting is fitted at this stage.
Where time and cost concentrate:
- Detail carving: the longest stage for complex forms; a skilled carver may spend days on a single face
- Grit progression: cannot be rushed; skipping grits leaves sub-surface scratches that reappear after polishing
- Recessed finishing: labour-intensive; brushwork in tight areas adds hours per piece
- Material complexity: inclusions, colour zoning, and internal fractures all require real-time decisions that slow progress
Buyers should request photographs at the post-roughing and post-polishing stages. A seller who cannot provide these either did not produce the piece or has no quality-control process.
How professionals grade carving quality: objective criteria
The three-part grading framework used by gemologists covers material, workmanship, and artistry. Gem carvings are judged primarily on these three dimensions, and the labour component often exceeds raw material value except in rare transparent gemstones.
Material: Colour saturation, clarity, freedom from inclusions, and species rarity all contribute. A common material carved with exceptional skill can outrank a rare stone with a poor finish — collector value is a balance between the two.
Workmanship: This is the most objectively measurable dimension.
- Edge sharpness: transitions between planes should be crisp, not rounded by over-polishing
- Recess crispness: interior carved areas should be as well-finished as exterior surfaces
- Polish uniformity: consistent sheen across the entire piece, including concave areas
- Absence of tool marks: no repeating grooves or ridges visible under a 10× loupe
- Symmetry: balanced proportions confirmed by measurement or direct comparison across axes
- Structural integrity: no fractures, fills, or repairs detectable under magnification
Artistry: Design appropriateness — whether the form suits the material — and compositional quality. A skull carved in obsidian that uses the stone’s natural conchoidal fracture as a design element demonstrates artistry. The same form in a heavily included, fractured piece does not.
Inspection protocol: Examine the piece under a 10× loupe with raking light (light from the side, nearly parallel to the surface). This reveals tool marks, uneven polish, and surface repairs that are invisible under direct overhead light. Follow with transmitted light (hold the piece up to a strong light source) to check for internal fractures and fills. UV light exposes resin fills and some coatings, which fluoresce differently from the host stone.
For buyers assessing pieces online, luxury craftsmanship standards provide a useful parallel framework for evaluating finish quality from photographs.
Pro Tip: Ask the seller for a photograph taken with a flashlight held at a 10–15° angle to the surface. This single image reveals more about polish quality than any overhead studio shot.
How to spot treatments, fakes, and undisclosed alterations
Treatments are common in the crystal trade and are not inherently disqualifying — but they must be disclosed. The problem is undisclosed treatment presented as natural quality.
Common treatments and what they change:
- Dyeing: Colour is introduced via porous grain boundaries. Look for colour concentrated along cracks or grain edges under magnification. A cotton swab with acetone on an inconspicuous area may lift surface dye.
- Resin filling and stabilisation: Fractures or porous material are impregnated with polymer resin to improve appearance and durability. UV light causes most resins to fluoresce differently from the host stone. Drill holes or broken edges show a two-layer structure under magnification.
- Heat treatment: Alters colour in amethyst, citrine, and some agates. Generally not detectable without spectroscopic analysis; ask for disclosure.
- Coating: A thin surface layer of wax, lacquer, or metallic film. Scratches differently from the stone itself; may peel at edges under magnification.
- Diffusion treatment: Colour or optical effects introduced into the surface layer only. Visible as a thin coloured rim when the stone is examined at a chipped or broken edge.
Practical detection steps:
- Examine under UV light: resin fills and many coatings fluoresce distinctly from the host material
- Use a 10× loupe at broken or drilled edges: two-layer structure indicates filling or coating
- Check colour distribution under magnification: natural colour is typically zoned along crystal growth; dye concentrates along fractures
- Request a gemological report for high-value pieces: labs such as the Gemological Institute of America (GIA) or the Canadian Gemmological Association (CGA) issue treatment disclosures
Questions to ask any seller:
- What is the country of origin?
- Has the piece been treated in any way (dyed, filled, stabilised, coated)?
- Who carved the piece, and approximately how long did it take?
- Is a lab report available, or can one be commissioned?
For a detailed buyer’s guide to detecting fakes in online listings, the fake crystal identification guide at Legacy Crystals and Minerals covers practical tests step by step. For distinguishing natural from synthetic material specifically, the natural vs. synthetic crystal guide is the relevant reference.
Red flags that should stop a purchase
Not every defect disqualifies a piece, but some signal either poor workmanship or deliberate misrepresentation.
Visual red flags:
- Bloomy or hazy surface that does not respond to cleaning: indicates incomplete polishing or a degrading coating
- Oily or inconsistent sheen across the surface: different areas polished to different grits, or a surface coating applied unevenly
- Visible resin seams at the surface: fills that were not flush-polished
- Round gas bubbles visible under magnification: glass imitation, not natural stone
- Repeating identical tool paths across multiple “unique” pieces: moulded or cast, not carved
Structural red flags:
- Fractures visible under transmitted light that were not disclosed
- Thin projections that flex or show stress cracks at their base
- Repairs visible only under magnification (mismatched polish, adhesive residue)
Transactional red flags:
- No treatment disclosure provided or offered
- Vague or absent provenance (“natural crystal from Asia”)
- Uniform batch pieces sold individually as hand-carved originals
- Price significantly below what the stated labour time would justify
Pro Tip: For any piece priced above $100 CAD, request a short video of the seller rotating the piece under a single-point light source. Resin fills, surface repairs, and uneven polish are nearly impossible to hide in motion under raking light.
Reading carving quality in real pieces from Legacy Crystals and Minerals
Three pieces from Legacy Crystals and Minerals illustrate how the checklist applies in practice.
Ruby in Zoisite Skull — 1.1 kg hand-carved specimen: Ruby in zoisite is a composite material — red corundum crystals (ruby) set in a green zoisite matrix, often with black hornblende inclusions. Mohs hardness varies across the piece (corundum at 9, zoisite at 6–7), which means the carver must adjust tool pressure and abrasive choice mid-work to avoid undercutting the softer matrix around hard ruby inclusions. On a piece of this weight and complexity, look for: consistent polish across both the ruby and zoisite zones (different hardnesses polish at different rates), clean eye socket recesses with no tool-mark ridges, and a base that sits flat without stress fractures at the jaw line. The 1.1 kg mass means significant material was removed; the absence of visible fractures in the finished piece is itself a workmanship signal.
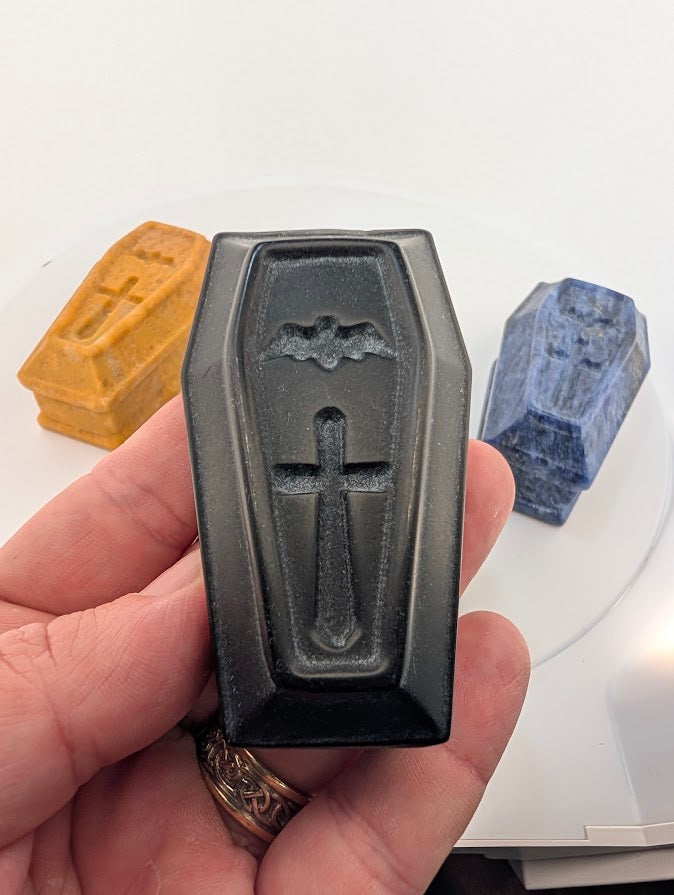
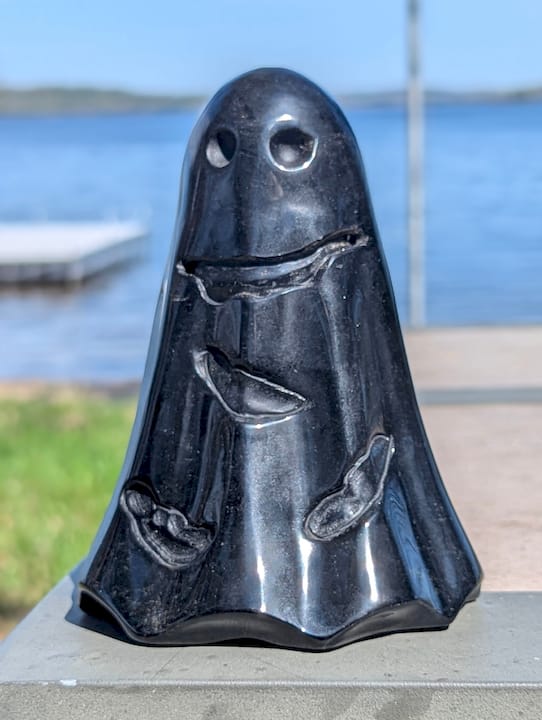
Crystal ghost carvings — Mahogany jasper and ruby in zoisite: Mahogany jasper is an opaque, fine-grained silicate (Mohs 6.5–7) with iron oxide banding. Its opacity means workmanship flaws are less immediately visible than in clear quartz, but edge sharpness and symmetry remain the primary quality signals. On ghost-form carvings, the thin projections at the top of the form are the highest-risk structural point. Check that these taper cleanly without micro-fractures at the base, and that the banding pattern was considered in the design orientation rather than cut across arbitrarily.
High-clarity inclusion quartz — Goboboseb Mountains, Namibia: This specimen illustrates the transparency challenge directly. Clear quartz preserves polish and edge definition but makes workmanship flaws more visible — every grind line and polish inconsistency reads through the material. The skeletal features (internal growth patterns) are part of the specimen’s natural character, not a defect. Provenance to a named locality (Goboboseb Mountains, Namibia) is a positive signal; it allows the piece to be cross-referenced against known material from that source.
Pro Tip: When evaluating a carved piece online, zoom into the highest-resolution image available and look specifically at the recessed areas and any thin projections. These are the two zones where quality differences between carvers are most visible.
For broader guidance on building a collection around pieces like these, the museum-grade crystal collection guide at Legacy Crystals and Minerals covers valuation and display in detail.
How to clean and store carved crystals safely
Carved crystals require more care than raw specimens because the polished surface and any thin projections are vulnerable to both mechanical and chemical damage.
Safe cleaning by material:
- Quartz and agate: Warm water with a small amount of mild dish soap; soft brush for recessed areas. Avoid ultrasonic cleaners if the piece has any fractures or fills.
- Jade (nephrite and jadeite): Warm soapy water only. No ultrasonic, no steam. Jadeite with polymer impregnation treatment is damaged by solvents.
- Calcite: Water only, brief contact. Calcite dissolves slowly in acidic solutions; avoid vinegar, citrus, or any acidic cleaner.
- Obsidian: Warm water and a soft cloth. No abrasive pads; the surface scratches at Mohs 5–5.5.
Display and storage in Canadian climates:
- Avoid direct sunlight for extended periods; amethyst and some dyed stones fade with UV exposure
- Maintain relative humidity between 40% and 60%; rapid humidity swings can stress fractures in composite or treated pieces
- Display carved pieces on padded mounts that support the base, not the projections
- In winter, keep pieces away from forced-air heating vents, which create very low humidity and static
Routine maintenance:
- Inspect under a loupe every 6–12 months for new micro-fractures, especially at thin projections
- Re-polishing should be done by a professional lapidary; amateur re-polishing with the wrong compound removes material and changes proportions
- Conservation-grade adhesives (such as Paraloid B-72) are appropriate for minor repairs; household superglue is not
Pro Tip: For provenance records, photograph each piece against a neutral grey background with a ruler and a colour reference card before displaying it. Store the images with the purchase receipt and any lab reports. This documentation is required for insurance and resale.
Legacy Crystals and Minerals: carved and polished pieces with documented provenance
Collectors who have worked through this checklist know what separates a well-sourced carving from a batch piece with no history. Legacy Crystals and Minerals offers carved specimens, polished stones, and mineral-based jewellery — including jade bracelets and chip bracelets — with provenance details, material identification, and treatment disclosure built into the product listings.
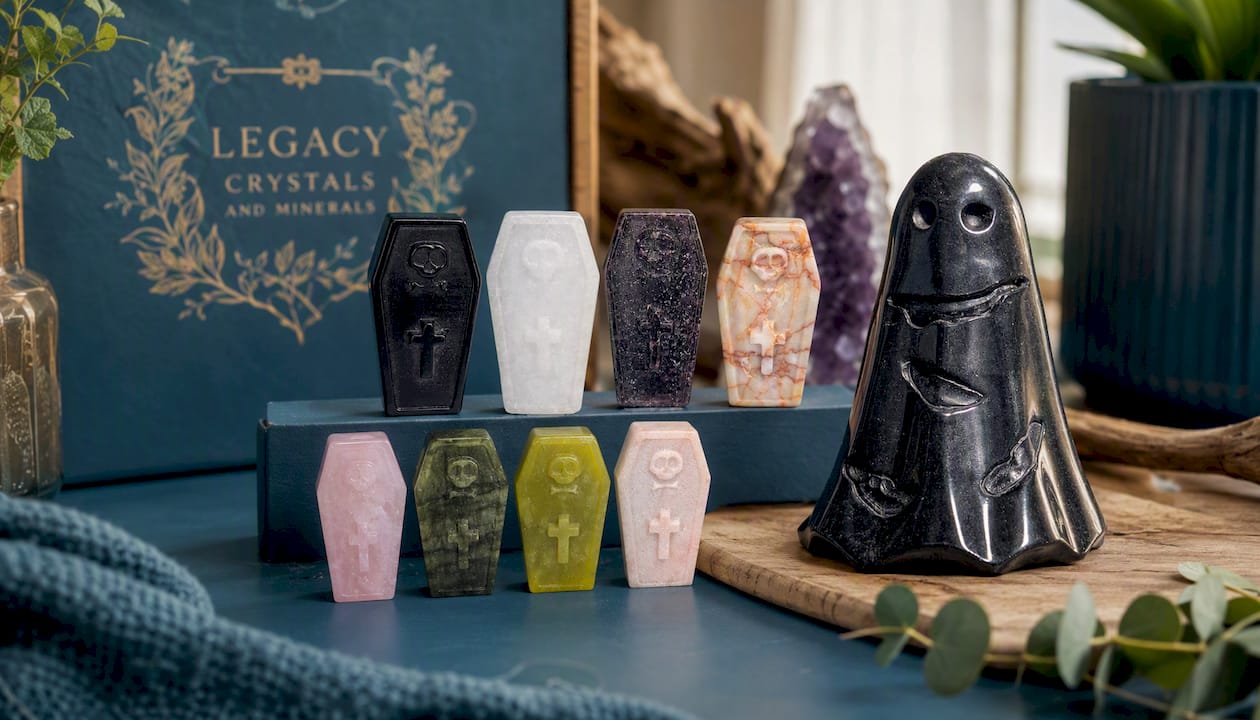
The Ruby in Zoisite Skull and Coral Jade Bracelet are examples of pieces where material identity, origin, and finish quality are stated directly. For collectors who want to apply the grading criteria in this article to a real purchase, the product pages at Legacy Crystals and Minerals provide the material and provenance data needed to do that. Browse the full collection at Legacycrystalsandminerals to find pieces that meet the standards covered here.
Sources
- Grading gem carvings - International Gem Society
- Hand-Carved vs. Machine-Made: How to explain the value of master-grade crystals to your high-end clients
- Smoky quartz intaglio carving - Rock & Gem
- Velvetmatter
- Quartz - Wikipedia
When a piece is high-value or treatment status is uncertain, request a report from a recognised gemological laboratory. In Canada, the Canadian Gemmological Association (CGA) issues treatment and identification reports. The GIA and AGL (American Gemological Laboratories) are also accepted by major auction houses and insurers.
FAQ
How can you tell if a crystal carving is high quality?
Examine the piece under a 10× loupe with raking light: high-quality carvings show crisp edges, uniform polish across all surfaces including recesses, and no tool marks or resin fills. The International Gem Society’s grading framework assesses material, workmanship, and artistry as the three core dimensions.
What crystals are best for carving?
Quartz varieties — including agate, chalcedony, amethyst, and carnelian — are the most widely used because their Mohs hardness of 6.5–7 and lack of perfect cleavage allow fine detail and durable polish. Nephrite jade is also a strong choice due to its exceptional toughness, despite a slightly lower hardness.
Are carved crystals real stone or glass imitations?
Many are genuine stone, but glass imitations exist. Round gas bubbles visible under magnification indicate glass; genuine quartz shows no bubbles and retains edge definition and polish differently from glass. UV light and a 10× loupe examination at any chipped edge will distinguish the two in most cases.
What is the highest quality standard for a crystal carving?
The highest-quality carvings combine rare, inclusion-free material with hand-finished workmanship, documented provenance, and no undisclosed treatments. Labour typically exceeds raw material value at this level, which is why hand-carved pieces command a 3×–8× premium over machine-produced equivalents.
What questions should a buyer ask before purchasing a carved crystal?
Ask for the country of origin, a full treatment disclosure, the name of the carver and approximate time spent, and whether a gemological lab report is available. For online purchases, request photographs under raking light and transmitted light before completing the transaction.
Recommended
- Raw vs carved crystals healing: choosing the right form – Legacy Crystals and Minerals
- Why crystals form different shapes: a science guide – Legacy Crystals and Minerals
- Display crystals at home guide: arrange and protect your collection – Legacy Crystals and Minerals
- Window crystals explained for crystal enthusiasts – Legacy Crystals and Minerals


